- Introduction
- The Online Proofing System (OPS) is an HTML based application, where an author, a group of authors or an editor can proofread and mark corrections to their proof.
- The author receives an email notifying that their article is ready for proofing.
- A link to the article is provided in the email.
- The link will open the article in the OPS for proofing.
|
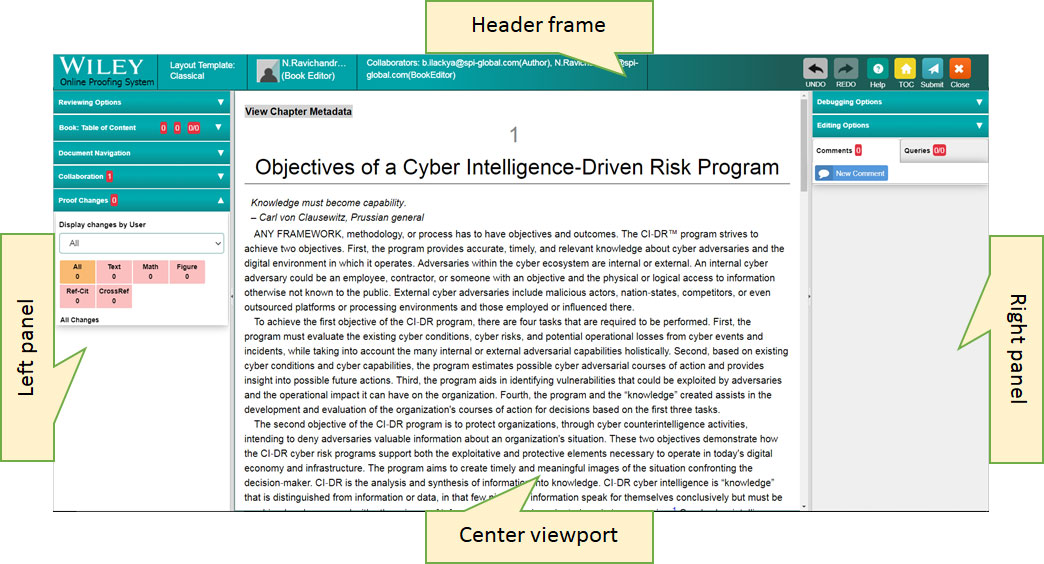
- Layout of the Proof (the page that opens after clicking on the proof access link)
- Header frame – Logo, Article Name, Author Name and a group of common menu options.
- Left panel – PDF reviewing options, Quick links, proof changes.
- Right panel – Editing options, comments panel and query panel.
- Center viewport (or the main scrollable view) – Article for proofing.
|
- Editing options
- Edit text – place the cursor by clicking the mouse pointer where you wish to edit, use the keyboard to input text and when finished hit the ENTER key.
- Delete text – as described above, place the cursor using the mouse pointer, and use BACKSPACE or DELETE keys.
- Format text – make a selection, and a popup toolbar will appear with the following options - Delete, Bold, Italics, Superscript and Subscript. Select the required format to apply on the “selected text”.
- Insert a special character – click the mouse pointer where you wish to insert a special character, a popup toolbar appears with two buttons – Insert Special Characters and Reference (see point g.). On clicking the Insert Special Characters button, a popup with a collection of special characters appears. Click on the special character to insert it in place.
- Edit a Math equation – right click on the equation and choose Edit. This will bring up a Math editor to edit the math equation.
- Image Options – there are options to add a note, replace existing image, download image, image history to see the history of previous replacements and an ability to revert to an older version of the image. Zooming into the image is also available.
- Add a reference – place the cursor anywhere in the Reference section, a Reference popup appears, click the Reference button to create a new Reference. The newly inserted reference item cannot be edited. However, you can, of course, undo (delete) it and insert a new one.
|
- Comments and Queries
- To add a comment, make a selection of text, go to the “Comments” section on the Right Panel and click on the ”New Comment” button. Type out a comment and click ‘OK’.
- You can view previously added comments by hovering the mouse over the comment. Commented text is highlighted with a yellow background.
- Go to the “Queries” section in the Right Panel, a list of existing queries will appear, clicking on any query will open the “Query Board” dialog to answer queries. Answer the query and click on “Ok”. All queries should be addressed before submitting your corrections.
|
- PDF Conversion
- A PDF file, with corrections marked, can be generated by clicking the “Proof Corrections PDF” button, under Reviewing Option in the left panel. This should be generated after saving your changes.
|
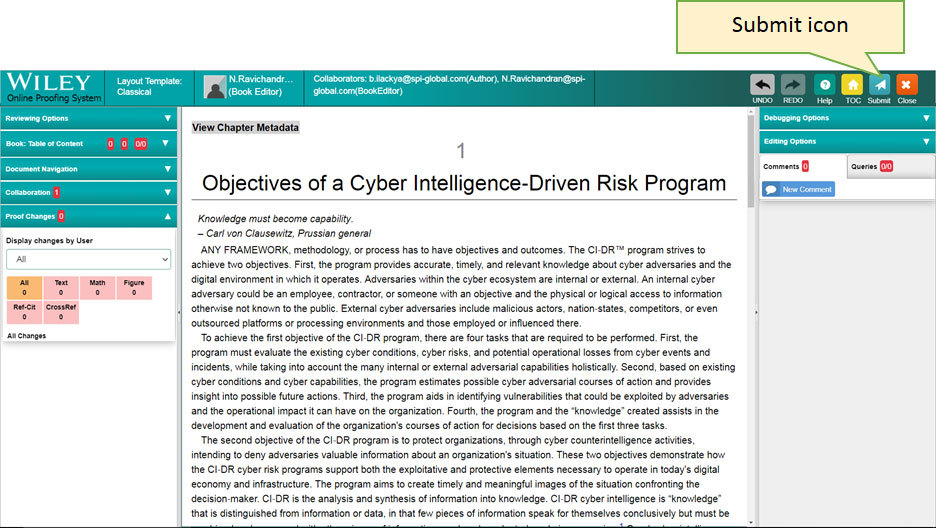
- Submission of proof
- Once proofing is completed, the user can submit the proof. No changes are allowed after submission.
|
- Browser support
- At present the OPS supports only desktop versions of Google Chrome and Mozilla Firefox in Windows.
|